Testing Paint Thickness: Your Guide to Used Car Inspections
Check a vehicle before you buy
Enter a VIN for a free instant preview — accidents, title brands, mileage, liens & open recalls.
Testing paint thickness starts with a gauge reading, and a factory-original panel usually sits around 3.5 to 5.5 mils, or 90 to 140 microns. On a used car, that number helps you spot repainting, hidden bodywork, and repairs that a glossy finish can hide.
You can stand in front of a car that looks flawless and still miss the story under the clear coat. A buyer who only trusts the shine is guessing. A buyer who tests paint thickness is checking the evidence, panel by panel.
Beyond a Car's Perfect Shine
A spotless finish can be misleading. Fresh polish, careful detailing, and good lighting can make a repaired panel look factory new, even when the coating stack tells a different story.
Testing paint thickness turns that first impression into a real inspection. On the consumer side, the goal is simple, measure the coating depth on each panel and look for panels that sit outside the vehicle's normal pattern. If one door reads noticeably different from the rest, that's a signal to ask why.
The reason this matters is practical. A gauge doesn't prove an accident by itself, but it often reveals where the seller's story needs confirmation. That's why the how to detect accident damage before buying a used car guide belongs in your toolkit, because paint readings work best when you use them to narrow down suspicious areas before you commit.
Practical rule: treat paint thickness as a pattern test, not a pass or fail on one reading.
Start with the assumption that most cars have variation, then look for variation that doesn't make sense. A roof, for example, often gives you a useful baseline because it's less likely to have been repaired than a front fender or rear quarter panel. Once you know what “normal” looks like on that car, the outliers become obvious.
That makes the inspection feel less like hunting and more like comparing notes. You're not trying to catch every microscopic difference. You're trying to find the panels that don't belong.
Choosing Your Paint Thickness Gauge
The right tool makes the difference between a useful inspection and a noisy one. For buyers, the choice usually comes down to magnetic pull-off gauges versus electronic gauges, and the practical answer is that a digital electronic gauge is the better fit for used-car checking.
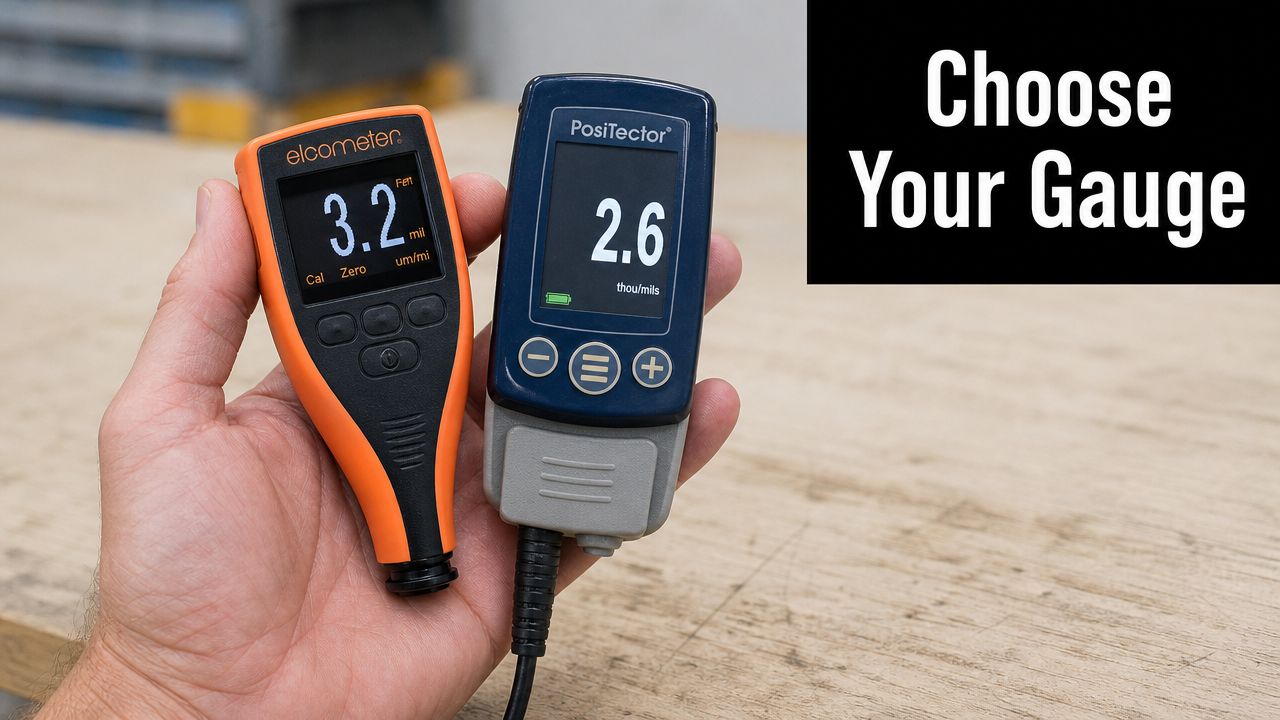
Magnetic versus electronic
Magnetic pull-off gauges have a place in industrial work, but they're slower to interpret and less friendly for a buyer who wants quick checks across multiple panels. Electronic gauges are easier to read, quicker to move from panel to panel, and better suited to the kind of side-by-side comparisons that matter on a lot walkaround.
The catch is that not every electronic gauge solves the same problem. Standard magnetic and ultrasonic gauges read the aggregate distance from metal to surface, so they're designed for total thickness, not layer-by-layer diagnosis. That's fine for spotting a repaint pattern, but it won't tell you whether the clear coat is the weak point.
A consumer buyer should care less about fancy extra modes and more about whether the device gives stable readings, displays both mils and microns, and can be zeroed accurately before use.
What to look for
A workable car-inspection gauge should be simple to operate, easy to hold flat against a panel, and clear enough that you don't need to decode the display in the parking lot. You want a device that lets you move quickly across the roof, hood, doors, and quarter panels without second-guessing the numbers.
For most shoppers, the best value is not the cheapest unit, it's the one that gives repeatable readings and fits the metal types you're checking. If you shop across steel and aluminum panels, that flexibility matters. If you want a deeper comparison of report tools alongside physical inspection, the vehicle inspection report guide helps you pair the gauge with the paperwork side of the purchase.
A premium industrial meter can be impressive, but it's often overkill for a first-time buyer. You don't need lab-grade complexity to avoid a bad purchase. You need dependable readings, a readable screen, and a tool you'll regularly use on every car you inspect.
The Correct Way to Measure Paint Thickness
Start with the panel, not the number. Clean the surface first, make sure it is dry, and calibrate the gauge before you trust a single reading. Dirt, moisture, wax, or poor contact can throw off the result, and a bad zero can make a factory panel look suspicious when it is not.
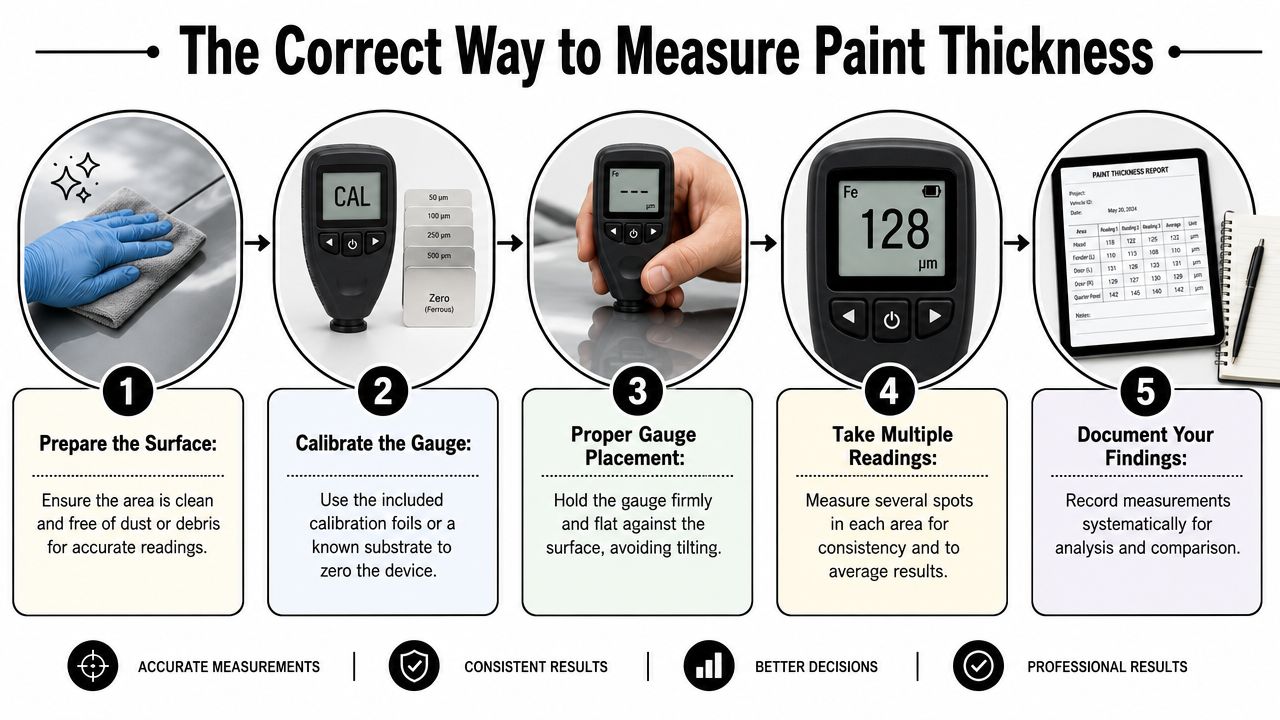
Start with setup, not the first reading
Use a simple sequence every time. Wipe a small area, confirm the surface is dry, then check the gauge against a known bare metal reference or a verified standard before you move to painted panels. That calibration check matters because an electronic gauge needs to stay within ±7% of the reference standard's known thickness to count as in agreement, and if it does not, the tool should be recalibrated before, during, and after use (DFT verification guidance).
A useful inspection starts with a baseline panel. On a sedan, I read the roof first, then compare it with the hood, doors, fenders, and quarter panels. That gives you a clean reference pattern before you get to the areas most likely to show repair work.
Read the car in a pattern
Do not stop at one suspicious spot. Take readings across the same panel in several places, because a repaired section can be narrow and one measurement can miss the edge of the repair zone. Keep the gauge flat against the panel, because angle changes can skew the reading and make the numbers harder to trust.
Read both sides of the car in the same order. If the front left fender looks normal but the front right fender runs thicker, that difference matters more than the absolute number by itself. You are comparing symmetry, not just collecting figures.
A blind spot is the layer stack. A normal total reading can still hide a thin clear coat, so a panel may look fine on the gauge and still have less protection than a factory finish. That matters for long-term durability, because the total build can look acceptable while the top layer is already too thin to hold up well. If you want to connect the physical readings with the paperwork side of the purchase, the vehicle inspection report guide shows how to line up the gauge results with the vehicle's recorded history.
Record what you find
Write the numbers down as you go. A phone note or small notebook is enough, and it makes the final comparison easier when you are standing in front of the car with the seller. If the readings jump around, check the calibration again and retake them.
The goal is consistency. A careful sequence shows whether the car is uniform or patched. That separates a random number from a result you can use.
Decoding the Numbers What Thickness Reveals
A paint gauge is only useful if you know what the number suggests. Its true value comes from pattern recognition, because thickness readings often point to factory paint, a repaint, or a more serious repair history.
Paint thickness reading interpretation
| Thickness (mils) | Thickness (microns) | Likely condition |
|---|---|---|
| Around 3.5 to 5.5 | Around 90 to 140 | Often consistent with factory-original paint |
| Higher than the surrounding panels | Higher than the surrounding panels | Could suggest repainting or refinishing |
| Much thicker than neighboring areas | Much thicker than neighboring areas | Could point to filler, heavy build, or a repaired panel |
Those ranges are useful, but only as a starting point. The more important question is whether the readings make sense across the car. One door slightly higher than the rest may be explainable, but a whole side with higher numbers usually deserves a closer look.
The biggest limitation of a consumer gauge is that it reads total build, not layer identity. Standard magnetic and ultrasonic gauges measure the aggregate distance from metal to surface, which means they can't tell you whether a thick reading comes from extra base coat or from a thin, weak clear coat on top (layer-specific blind spot note). That matters because a “normal” total reading can still hide a dangerously thin clear coat that may fail early even if the overall number looks acceptable.
For a buyer, that changes the goal. You're not just asking, “Was this panel repainted?” You're also asking, “Will this finish hold up?” A car can look good today and still be more vulnerable to UV damage, gloss loss, or premature wear if the clear coat is too thin.
Inspection mindset: a gauge reading tells you what the panel measures, not what the shop did inside each layer.
That's why thickness numbers should lead to questions, not instant conclusions. If a seller says the car is original and one fender measures far above its neighbors, the number gives you a reason to dig deeper. If the reading is normal but the finish still looks dull, you may be seeing a different kind of problem altogether.
Common Mistakes That Lead to Wrong Conclusions
The most common mistake is treating the gauge like a fixed truth machine. It isn't. Handheld units can drift when temperature changes, and recent industry protocols warn that a 10°F swing can create a 3 to 5% error margin, enough to turn a factory panel reading of 6 mils into something that looks like 7.5 mils if the gauge isn't zeroed for the new conditions (calibration drift note).
What usually goes wrong
A dirty panel can distort the contact point. A tilted gauge can under-read. A single reading can miss a repaired patch that sits between measurement points. And a gauge used on the wrong substrate won't give you anything reliable at all.
The temperature issue is the one buyers overlook most often. A reading taken in a warm garage and another taken outside on a cooler lot can't always be compared as if nothing changed. If the conditions changed, the gauge should be re-checked before you trust the next panel.
Five errors to avoid
- Dirty surface: Dust, wax, or road film can interfere with contact and lead to noisy results.
- Skipping calibration: If the gauge isn't zeroed against a known reference, every later reading is suspect.
- Angled placement: A probe that isn't flat against the panel can give inconsistent thickness values.
- Only one reading: One point on a panel can't represent the whole area.
- Wrong substrate: A gauge meant for metal won't help on a plastic bumper.
A careful buyer treats each reading as part of a pattern, not a standalone verdict. If the numbers look odd, check the environment first, then the tool, then the panel. That sequence prevents a lot of false accusations about repainting.
The practical payoff is simple. You avoid rejecting a good car because of a bad reading, and you also avoid trusting a questionable car because one panel happened to look normal.
Combining Your Findings with a VIN Report
Paint thickness tells you what the car has physically endured. A VIN report helps explain why the numbers look the way they do. Used together, they close a gap that either method leaves open on its own.
A common scenario is easy to miss. A fender reads thicker than the rest of the car, but the VIN report looks clean. That doesn't mean the gauge is wrong. It often means the repair was never captured in the reporting chain, which is exactly why history reports can miss vehicles that suffered serious damage but were not declared a total loss (Consumer Reports on history report limits).
How the two checks work together
A paint gauge is physical evidence. A VIN report is record evidence. When they agree, your confidence rises. When they conflict, you have a reason to ask for service records, photos, or a better explanation from the seller.
That's especially useful on older vehicles, where decoding model history and ownership patterns can be messier than buyers expect. If you need a practical walkthrough on older chassis and paperwork, the guide to older vehicle VIN decoding is a helpful companion to a paint inspection. For the report side, the VIN lookup report page can help you compare the digital trail against what the body panels are telling you.
A complete check matters more than a single clue. A clean report with abnormal paint readings deserves scrutiny. A questionable report with normal paint readings deserves the same.
A vehicle can look perfect, and still carry the evidence of hidden work in the finish. Before you buy, pair the panel measurements with a VIN check so you're not relying on guesswork. If you want a faster way to compare the physical inspection with the digital history, start with VekTracer and use both together before you hand over the money.
Ready to check a vehicle?
Enter any 17-character VIN for a free instant preview — no account needed.